
When we bought our wee bungalow, almost twenty years ago now, the back garden was little more that a large damp patch of lumpy-patchy moss-infested grass, a few concrete slabs carefully laid to trip you up and a timber garden shed well on its way to falling down with rot. We’ve done a heck of a lot since then including, getting rid of all that horrible grass (bliss, no grass to cut!), a wee greenhouse, a compact potting shed, The Man Cave, Cathryn’s shed, moving the boundary fence, properly laid slab paths, a rainwater collection system (water butts!) some raised beds, planted borders, acres of gravel, two storage areas, two compost bins, a small pond with mini swamp, a conservatory and a rotary dryer. Oh, and two bird baths.
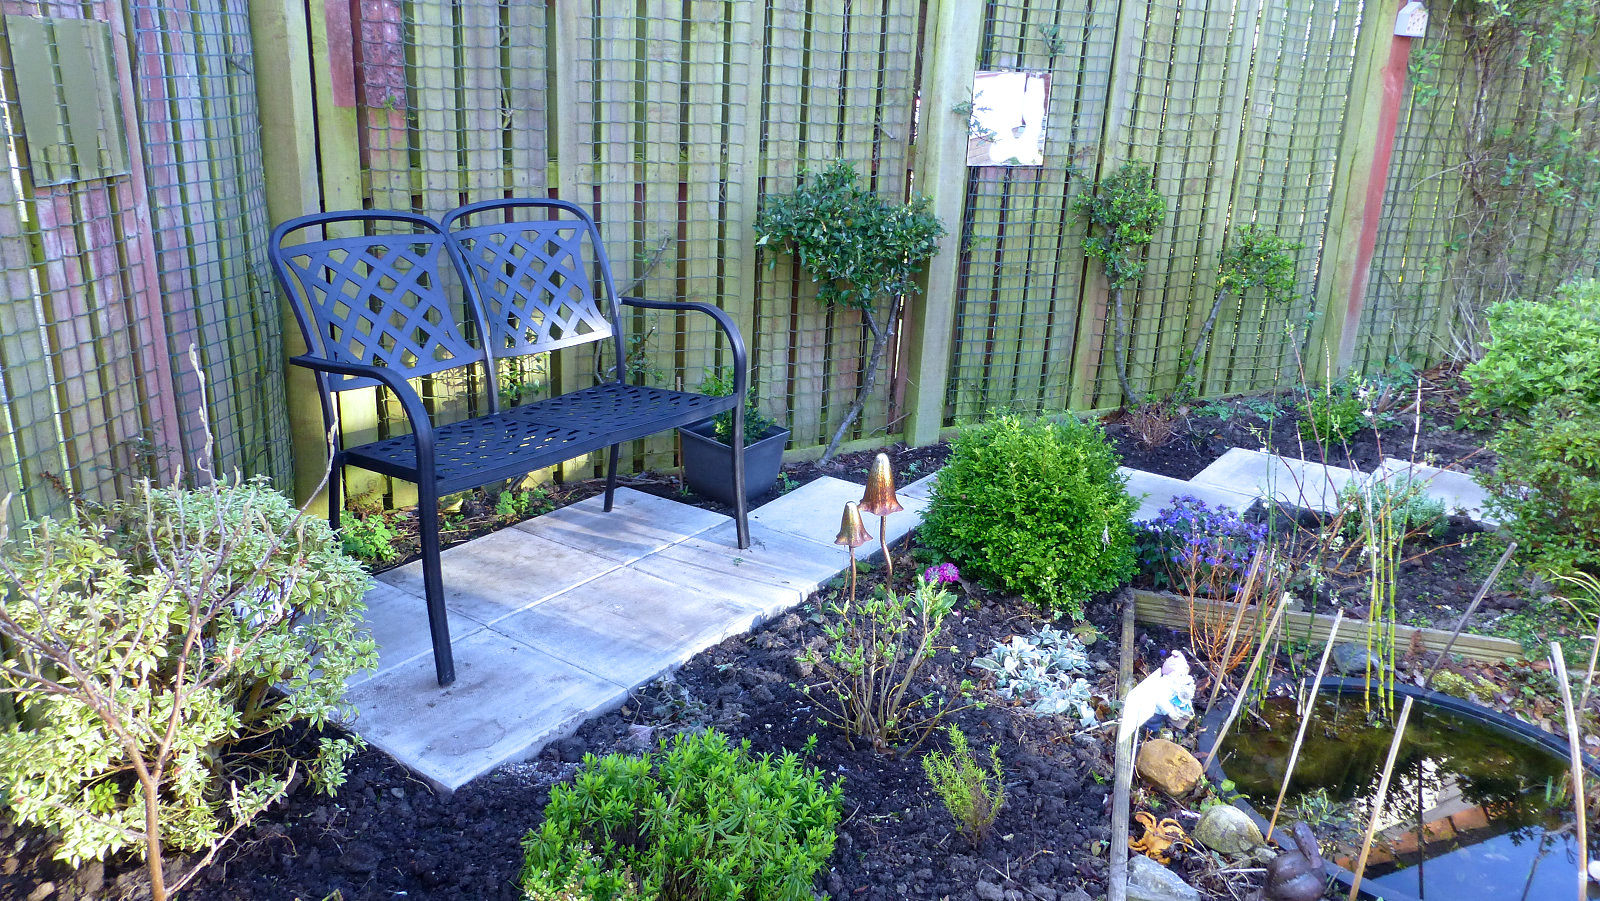
Now, you might think there’s not much we could still do in our wee garden but Cathryn still managed to find something, and the space to do it in. A two-seater garden bench. The site for the bench was the planted area between the pond and the fence, a neat shady corner offering up a different view of the garden. Of course, you cannot simply dump a bench onto soft soil and expect it not to sink to ground level the first time you sit down and spill your coffee, or horror-of-horrors, drop your Kit-Kat in the pond! So, a good solid foundation was required.
We settled for 450 x 450 mm concrete slabs, smaller than the more usual 600 x 600 mm, due to the small space we had to work with and also for better ease-of-use, namely, they’re not so bloody heavy, 25 Kg each rather than 40 Kg. Everything was ordered online from Thistle Timber & Building Supplies at The Wisp, Edinburgh. It’s a lot less hassle getting them delivered rather than multiple back-breaking trips in the car to B&Q, or where ever. The delivery guy even lifted them across the fence right next to where I needed then. Saved a ton of wheel-barrowing.
First task of the project, after Cathryn removed some plants to create a clear area, was to dig a muckle great hole. With the ground so soft, I wanted a good solid foundation, so excavated down about a spade depth, back filling with type-1 hardcore. I initially thought two bags for each 450 x 450 slab but actually needed just over three bags each. In total some 40 bags of hardcore were carefully layered, compacted and levelled using the flat head of a 14 lb sledge hammer. The final layer was 50 mm of sand, again carefully compacted and levelled. The area under the bench was level but the short path was to a fall, much more awkward. I’m always surprised just how much soil seems to come out of a hole, bags and bags of the stuff, initially destined for the recycling centre but finally ended up under the trees out front and in the neighbour’s garden (at her request, I might add).
The slabs themselves went down fairly easily, though a fair bit of lifting up and re-levelling was required. Hard on the back, lifting and placing 25 Kg concrete slabs. But eventually, all 12 slabs were down and mostly level. There’s been some minor settlement since the last rain but I can fix that once my poor aching back has recovered. The final task, one which Cathryn was fair keen to get on with, was the replanting. A final brush and tidy up, and job done.
But that wasn’t all. We noticed that the boundary fence had a bit of a wobble. Investigation revealed that a post a snapped completely through, about 150 mm below ground level. Now, replacing an 1800 x 100 x 100 mm fence post is no easy task. There’s also another 600 mm of the post sunk into the ground and surrounded by concrete. Replacing it would require clearing a space in the garden, digging out the post and breaking up the concrete (most likely requiring the hire of a Kango hammer). The material cost would be about £30.00 but the labour involved is considerable. Yes, there is always the option of getting a man to do the job, but from experience actually getting someone to even quote for these small jobs, then actually doing the work properly, has always proved difficult. So, time for some thinking.
After a week or so, I had the solution, or rather, solutions. First expose the post down to the concrete level. Next, splice the two post sections together with a hefty metal plate. Then drill some holes into the concrete and secure some really big screws/bolts, along with a few more in the upper section of the post. Finally, backfill with concrete. Once set, the concrete would bind the post to the existing concrete. Total cost £16.00 for two bags of concrete mix. The screws and metal straps were left-overs from old projects. Sorted. Nice one!
Copyright ©2022 Gary Buckham. All rights reserved.