
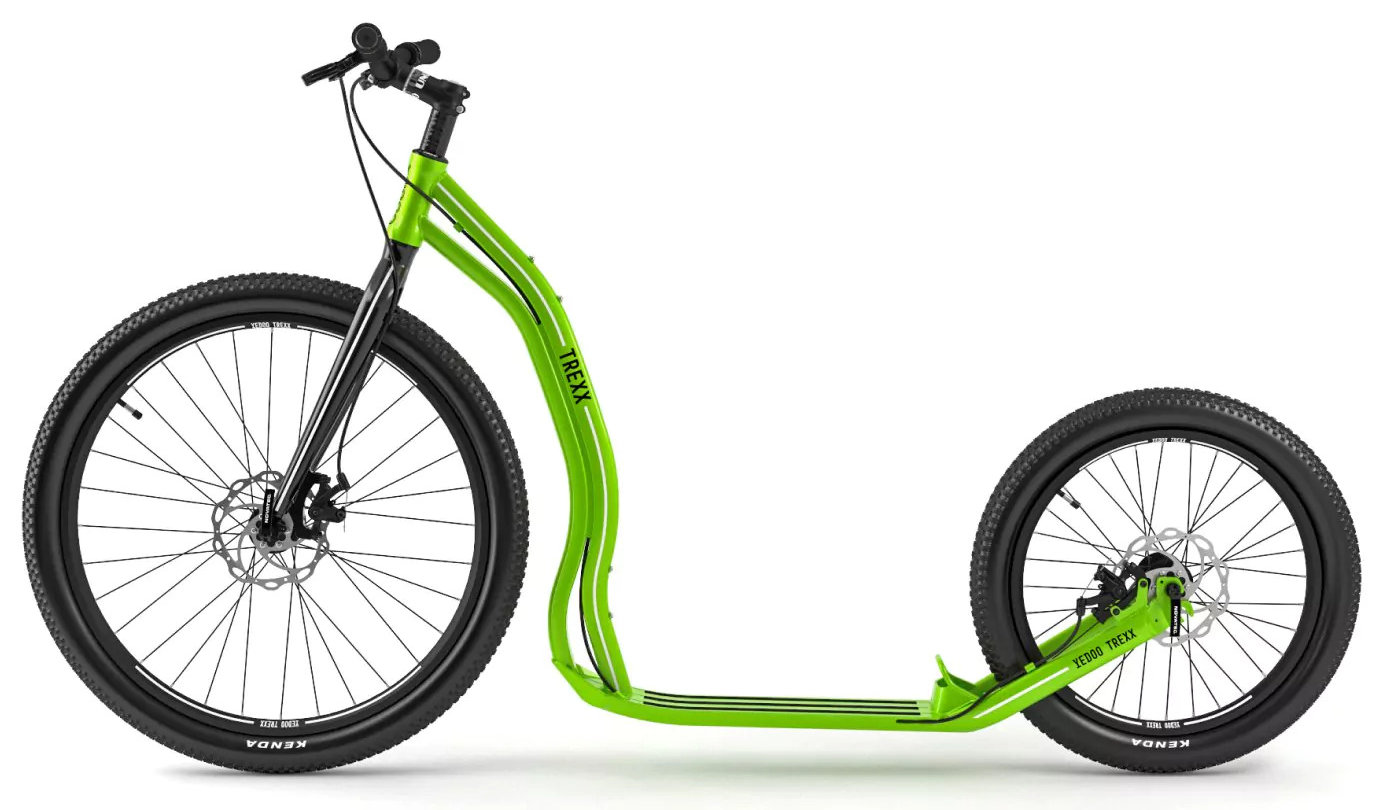
Well, great news folks, the Yedoo Trexx Disc has finally arrived, through communication from ordering to the parcel arriving at the door was distantly lacking, if fact, non-existent. Rather disappointing when compared to the usual UK orders when just about every stage of the process is notified by email, text or both. The website states 7 to 10 days for delivery, the order was placed on the 18th and it arrived on the 29th. Not complaining really just would have preferred to be kept informed. Guess we get too used to next day, or even same day, delivery from Amazon!
First task was assembly, beginning with laying out all the parts, checking they were all present and scanning everything for damage. One small FFS moment when I noticed the box was damaged and a part protruding but it only the plastic cover protecting the wheel hub. No cause for concern but certainly one of those disappointing bloody hell moments when you start thinking about returns and all that annoying time-wasting carry on!
A few items required installing onto the main frame, starting with the handlebars, followed by attaching the brake cables. The two brake rotors needed bolted to the wheel hubs and the wheels attached. Final task was to adjust the brakes. Overall, nothing a too difficult though if you are not comfortable with bicycle repairs best left to the experts. And if you do need a professional fellow Yedoo kick scooter enthusiast Scott at Mutts Cycles in Newtongrange is the man to go to. You might even get a cup of tea but don’t expect any biscuits. 🙂
Of course, that was only the basic assembly. I also had a few other modifications to complete. The first was removing the supplied KENDA Small Block Eight tyres and installing a pair of Schwalbe Marathon Plus 1.75″ tyres, my preferred option. These tyres are fairly heavy compared to the KENDA but offer far better puncture and rolling resistance. I decided against adding tyre sealant for the moment, thinking I’d see how they fair regards punctures.
The mudguards were next, no point getting a wet arse/legs/back every time you go out when the roads are wet. Quite a tricky job, especially deciphering the meagre instructions regarding which of the different length of stay goes where and what combination of bolts goes where. In the end I decided to do what I usually do and do what I know works. On the handlebars, a bell and phone mount was added along with Ergon GS1 EVO grips. These have a wider flat platform rather than the usual round one and are much more comfortable. Final tasks included pumping up the tyres, double checking all bolts and a slow, careful test ride out front.
Initial impressions. Slightly different to the Swifty kick scooter with the main one being the slightly lower foot platform. But the most obvious is how easy it covers the ground. One kick and away you go. Seems to go on forever. Handlebar height seems fine though longer rides may show different. And it’s so smooth and quiet that you would think that stealth mode has been switched on. Guess the lack of moving parts such as pedals, chians and sprockets makes all the difference. I like it! Some noise from the tyres but that should reduce as they lose their newness and bed in.
Now, two tasks still remaining on the to-do list. One is swapping the cable-operated disc brakes for Shimano hydraulic disc brakes, on hold as I’m still waiting for brake hoses to arrive. So annoying when you order things that are supposed to be “in stock” but you keep getting emails advising of delays and further delays. I have the brake levers, the brake callipers and all the small parts required for the swap. Just need those hoses. Be patient, Gary.
The other task is deciding on some means to carry stuff on the kick scooter, though some might call it a kick bike. I prefer the term kick scooter, so will stick with that. The idea for using a stem mounted handlebar bag wasn’t working, juts not enough space and assorted smaller bags on various parts of the frame seemed all rather untidy. What I really wanted as one medium-size bag and the simplest option was on a front carrier. I did consider a rear carrier but that would require some engineering work. Not impossible but going with easy option for now.
Research showed plenty of front rack options but the neatest one I found was a Pelago commuter aluminium front rack (small), in black. Fits most bicycles with 26” or 28” wheels so should fit the front of the Trexx Disc just fine. Might need longer bolts and spacers to clear the forks. Little bit pricey at £85.00 include postage but will allow me to attached the rack bags I use for all my bikes and keeps everything neat and tidy. I’m not keen on the bike-packing way of doing things with multiple bags mounted all over the place. Just too untidy for my mind.
So, there we are. The Yedoo Trexx Disc is locked and loaded and ready to roll. Just waiting for my aching back to settle down, the front rack to arrive and a-scooting we shall go. Back with more soon.
P.S. Forgot to mention. No place to mount a rear light. Front lights are fine. Another puzzle to solve!
Copyright ©2026 Gary Buckham. All rights reserved.