
A recurring problem with drainage on our paved driveway prompted me to do something about it. After heavy rains water accumulates on the surface of the pavers immediately next to the house and takes forever to drain away. We had the driveway re-laid some 18 months ago and to start with there wasn’t a problem. However, over time the too-narrow strip of gravel between the paving edge strip and the house has silted up preventing water draining away.
Our original paving had a wider gap between the pavers and the house, around 200 mm wide, and allowed water to easily drain away. The contractor who re-laid the driveway suggested we should pave that area and increase the area of the driveway. As it turned out not such a good idea. Part of the problem is that the paving edge strip is held in place with a mortar fillet, something which also prevents water from draining away. The remedy was to move the edge strip away from the house, as it was previously.
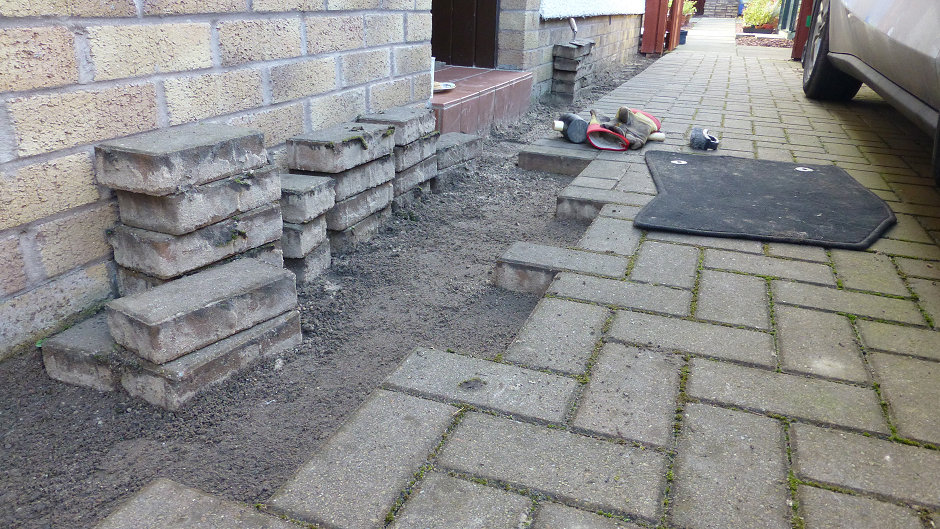
First task was to clean out the mixture of gravel, sand and assorted windblown debris along the edge, followed by chipping out the mortar fillet to free up the pavers and allow me to remove them. The ideal tool for this turned out to be the slater’s hammer I use when out brick spotting – more on that above, if you are intrigued to know more. Next task was to lift the paver edge strip itself, easily managed once you get the first one out of the way. The remainder were fairly straight forwards to remove, although a few stubborn individuals wanted to stay put. A few blows from a rubber mallet soon sorted then out.
Removing the next two rows was much more challenging and only by using a hammer and chisel were these ones able to by lifted. It would have been simpler to go at it with some force but I wanted to keep the underlying sand bed intact as I was going to be relaying these pavers later. Once lifted, each paver was brushed clean, the sand bed brushed clear of excess sand and the pavers re-laid. The rubber mallet was used to get them level and earned its keep today. It took most of the morning to lift and relay the pavers.
After stopping for lunch, I tackled the next part of the job, applying a mortal fillet to keep the edge strip in place. First I used a trowel to scoop out a shallow trench in the sand bed, then mixed up a bucket of 4:1 sand and cement and laid down a triangular fillet of mortar with the trowel. Final task in this part of the job was to brush in some kiln-dried paving sand into the joints between the pavers. To help with the drainage I also laid a pipe under the pavers at the door entrance, just in case the pavers there were impeding the flow of water during rain. Hopefully the pipe should allow water to flow under the pavers and away.
The final final task was to lay down some ground fabric and backfill with Lanark red gravel. Overall it took around 6 hours to complete the job, perfect for a Sunday. Costs were minimal, only £8.00 for a bag of ready-mixed mortar. The length of pipe was a left-over offcut from another project as was the ground fabric. The gravel was sourced from elsewhere in the garden where we had used more gravel than was needed and would not be missed. Probably saved a good few £100’s and got some exercise into the bargain.
Copyright ©2020 Gary Buckham. All rights reserved.