
Went to see a stripper this morning. Not very good, in fact, most disappointing. No scantily clad young ladies (or these days, lads, if I’m being PC) dancing about and becoming even more scantily clad than before. No drink on offer other than multi-stewed tea you could stand your spoon up in or extra strong coffee that dissolves the spoon. No background music other than Radio Forth. Just four burly blokes in grubby overalls talking about football, cars, motorcycles and women. In that order.
Okay, yes, yes, not that kind of stripper. You naughty person if you were thinking that way! The other kind. The kind that wears a space suit with breathing apparatus and uses high pressure grit to blast paint from bicycle frames, bicycle forks and the like. And, yes, it’s that single speed custom paint bicycle project again. Things are progressing, albeit, slowly.
Popped into Pentland Powder Coatings this morning to collect my newly stripped bicycle frame and forks. Looks good but felt a little rougher than I expected. But to be fair, I wasn’t really sure what to expect. Quite an expensive exercise this, at £40.00, but well worth the money when you consider the alternatives. And those are hours of rubbing down with wet ‘n’ dry paper or working with those nasty bad-for-the-environment (and your health) chemical paint strippers. Neither very attractive, especially the latter with all that mess to deal with. Been there, done that and never again.
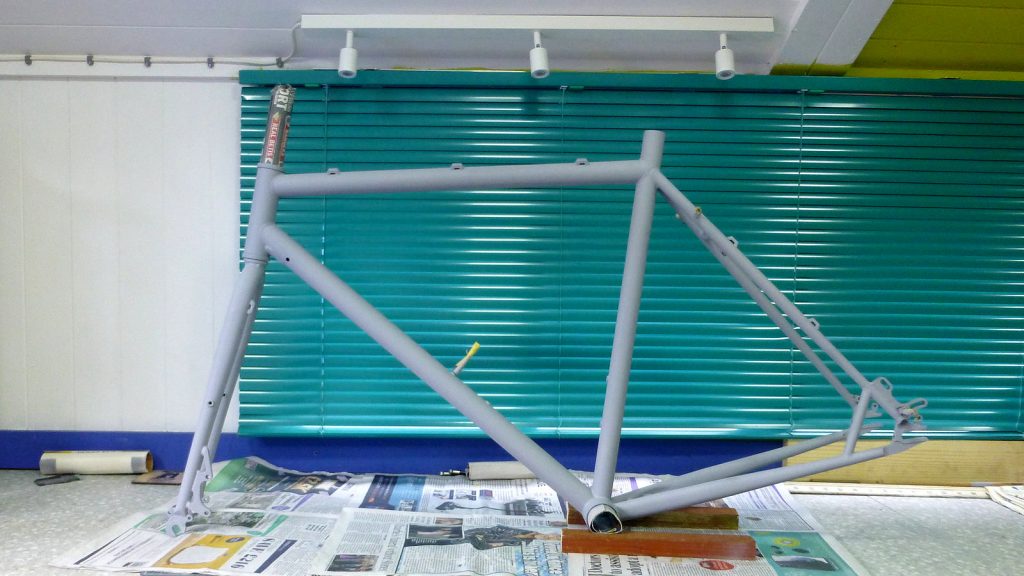
So, where are we? Well, that’s frame, forks, wheels rims and handlebars all primed. The slightly rough frame and forks needed some gentle rubbing down with wet ‘n’ dry paper, as did the wheel rims and handlebars. Though these later parts did not need stripped as they were brand new and easily flattened down to provide a key for the primer.
Oh, one thing I should mention about sandblasting bicycle frames, in fact, anything hollow, is that the grit gets inside and needs a good shake and shoogly to remove any lingering particles. We don’t want them adhering to the wet primer, or worse, the finished paint. If you do this over some spread out newspaper, you can actually hear the particles landing on the newspaper. When that stops, you are done, probably. In fact, give it another go just to be sure. Handy if you have a compressed airline, which I don’t. However, a can of compressed air-duster helps.
Making sure everything is clean before priming makes all the difference. Remember the 6 P’s – Proper Preparation Prevents Piss-Poor Painting. I watched so many so-called instructional videos online and saw so many errors that I gave up and planned my own methods. One girl used a really coarse sandpaper to rub down some plastic mudguards. What a mess! She also held the spray can horizontally pointing down, a big no-no as you get splutters, and no safety mask or gloves either. How not to spray paint more like.
After rubbing down a good wash of the parts with soapy water is essential. Then, after allowing to thoroughly dry, a final wipe down with something like rubbing alcohol, or isopropyl alcohol, will remove any lingering oil, grease or finger marks. After this stage, do not touch any parts to be painted with bare hands. Always wear gloves.
Spraying the primer was quite easy but I soon realised there was more than that to think about beforehand. One is how to support the components while spraying. No problem with the handlebars or forks, they can be handheld easy enough. The frame though is another matter. I worked out a good way to do this is to use your bicycle work stand to hold the frame. Insert a broom handle into the clamp, then slide the frame onto it via the seat tube. The frame is then safely supported and can easily be swivelled round while painting. Remember to mask the broom handle or your wife/partner/mother will not be amused. A good tip is to add a few bolts to the bottle cage, rack or mudguard mounting holes which will allow you additional places to handle the frame while painting.
Another consideration is where to place the items after painting, to allow them to dry. Always wise to think this through before you complete the painting process. It’s a bit late if you have a wet newly sprayed bicycle in your hand and nowhere to put it down without the paint touching something. With the wheel rims and fork, I rigged up some hooks on the shed ceiling and for the frame, some supports on the shed bench. To save time and effort later, placing bolts into all threaded holes with help prevent paint getting in. Same goes for head tube and seat tube ends and also the bottom bracket threads. A rolled-up piece of stiff paper will protect these. I used a crunchy nut cornflakes packet (empty). The fork stem and seating for the headset bearings should also be masked.
The primer I used was Spray.Bike Frame Builder’s Metal Primer, a 400 cc spray can. One can was just enough to apply a single coat to frame, forks, handlebars and two wheel rims. The trick here is to RTFM, that’s Read The F****** Manual before you start. In this case, the instructions are online. Again, watched a few instructional video and some were making a right mess by spraying from the wrong distance. This paint type recommends about 200 mm from the object. Always keep the can moving and held upright. You also needs to shake well for 3 minutes and a short test spray before each application. Makes all the difference.
Finally, not having a proper spray booth with extractor fan, I used the small outside area between our garden gate and the new porch. It’s fairly sheltered from the wind there but I hung old sheet on the fence to help enclose the area and also on the driveway to prevent any overspray making a mess. Again note, wife/partner/mother will not be amused. Not ideal but better than inside the confines of the shed. It goes without saying, but I’ll say it anyway, wear old clothes, use a proper spray painting face mask and goggles, and wear protective gloves. You only have one set of lungs.

More soon when the painting will begin!
Copyright ©2023 Gary Buckham. All rights reserved.